Azure Blob Storage – Part 2 (WHAT and WHERE)
This is the second part of Azure Blob Storage series.
- Azure Blob Storage – Part 1 (WHY)
- Azure Blob Storage – Part 2 (WHAT and WHERE)
- Azure Blob Storage – Part 3 (HOW) — Coming shortly
- Access Control policies (HOW LONG) — Coming shortly
- Triggering Azure function to process Blobs — Coming shortly
In part 1 we discussed regarding why should we re-consider the storage strategies to be ready for ever-growing data and fickle minded users with very short attention span. You want your storage to be secure, reliable, faster, scalable and easy to manage.
Lets start with the necessary pre-requisite steps we would need before we are able to expose the blob container as a service to clients.
Create a storage account in Azure portal.
- Active Azure Subscription: You will need an active azure subscription which should have enough credit or you can start with a free trial.
2. Create storage account: Please refer to the link to learn how to create storage account. Please remember to make informed choices for below parameters while creating the storage account.
- Deployment model: Either use resource manager templates or classic (manual-scripted) deployment.Choose resource manager for this example.
- Account Kind:
- General Purpose – It can be used to host files,blobs,tables and queues.
- Blob Storage – It uses advanced features like cold/hot access to optimize storage as per item’s usage patterns.
- Performance:
- Standard – These are backed by hard disc devices. Stick to standard for lower environments.
- Premium – It is backed by Solid State devices SSD for faster access hence better performance. Use this for production.
- Replication: Replication helps you decide what targets you have set for scalability. Analyze the cost affectiveness of your choice. This MSDN Link is good to make an informed choice.
- Subscription: If you have many azure subscriptions, choose one.
- Resource Group: Think of these as Lifecycle boundaries. When multiple azure resources share a group their lifecycle (create,update etc) are managed in an integrated way. For demo purpose you can create a new one or use ayone existing.
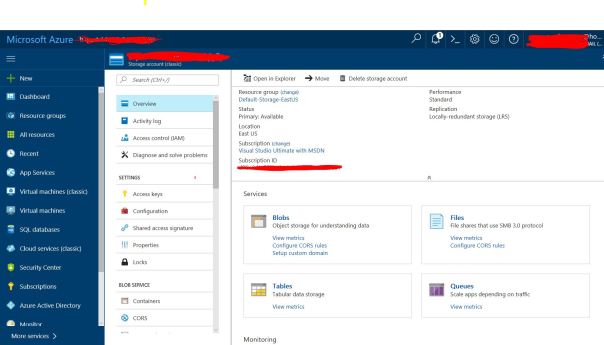
- After creation of your storage account it will look like above screenshot. You can see the overview is at account level which actually hosts all storage services Blob, Files, Tables and Queues.
- You can also see the link “Access Keys” on left which is important. This key section contains a ConnectionString. It has an account name and a key (Primary and secondary). You may understand that this key is maintained at account level hence if user should access blobs ONLY then this access policy is not very effective. We will come back to this problem in part 4 about access control policies.
3) Click on link to Blobs. You should see the screen below

You can create a new container if you wish to. I got a container by default from my subscription.
You are all set to start uploading the files in this blob store. You can use the portal to upload files manually as well. You should see the below listing if you have few files uploaded.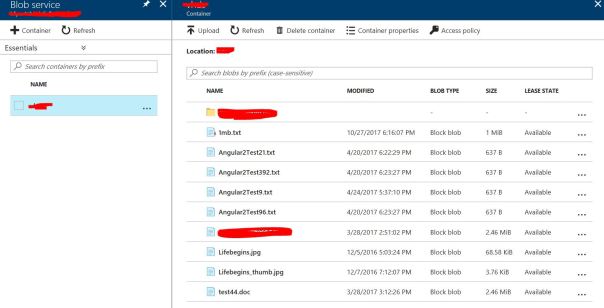
Till now we have covered
- WHY to use Blob as storage option
- WHAT we can do with it.
- WHERE to procure the necessary infrastructure. [Azure]
We have not written any code as yet. In next part 3 we will walk through the code to achieve the following.
- Upload a file to blob storage.
- Download a file from blob stroage.
Access control policies will be discussed in part 4.
Azure Blob Storage – Part 3 (HOW) — Coming shortly
Posted on November 5, 2017, in .NET. Bookmark the permalink. Leave a comment.

Leave a comment
Comments 0